

|
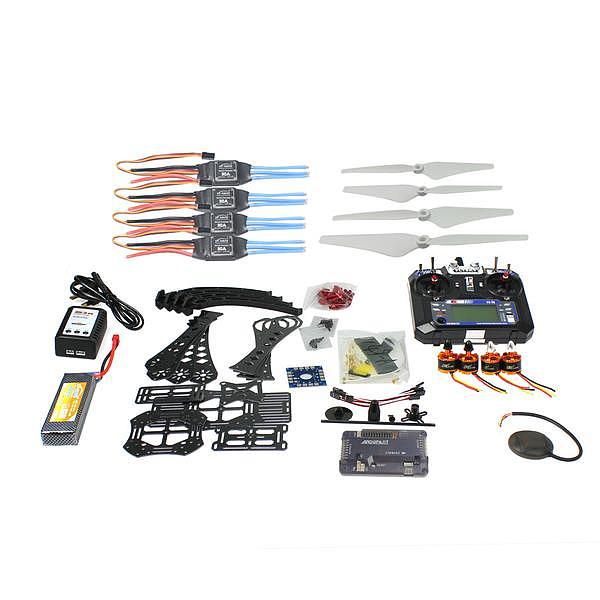
| Product Name | DIY RC Drone Quadrocopter Full Set RTF X4M380L Frame Kit APM 2.8 GPS TX F14893-L |
| Item NO. | F14893-L |
| Weight | 2.3155 kg = 5.1048 lb = 81.6769 oz |
| Category | DIY RC Drone Accessories > DIY RC Drone Kit |
| Tag | |
| Brand | XT-XINTE |
| Creation Time | 2017-07-25 |
This guide will show you all the cables and parts that you will need to connect to your APM.
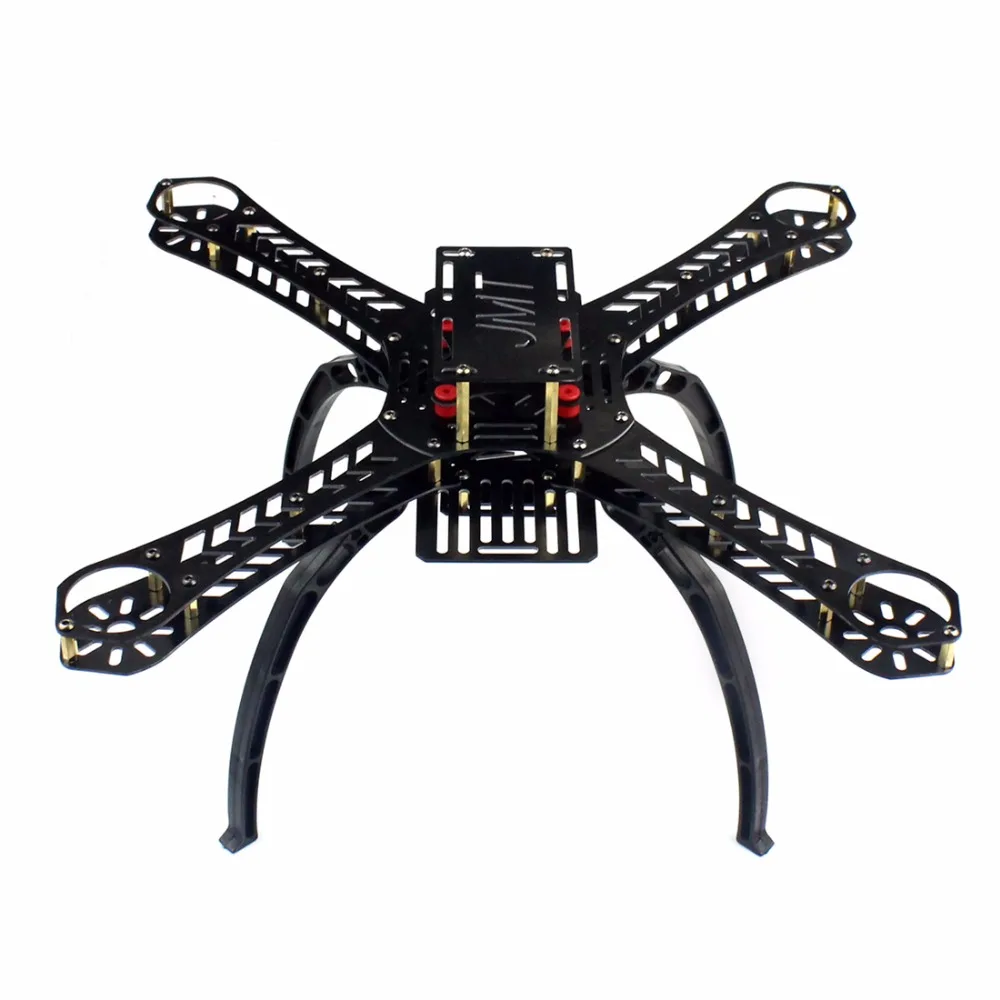
Typical Quadcopter Layout
Please note the illustration Below highlights a (TYPICAL) installation. It contains optional equipment including a Camera Gimbal and a Battery Monitor and it utilizes an ESC wired "Y" power connection rather than the power distribution board common to many MultiCopters.


1. Connecting your motors and RC gear
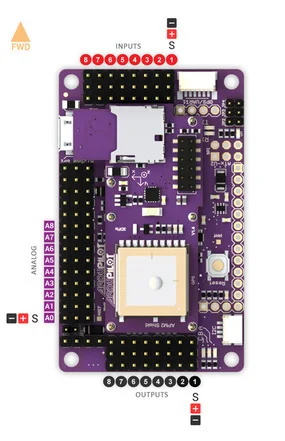
Overview of connections on the Ardupilot Mega v2 board
|
Note: the instructions below are for regular RC receivers with PWM output (one cable per channel). If you're using a "PPM" receiver (one cable carries all channels), follow the instructions .
Before you can configure your Arducopter, you will need to first connect everything together. This is quite easy. You need to connect your RC receiver to the Input side of the board. You can use the cables included with your Arducopter Kit, or if you are using another frame, you can use jumper cables, or female to female servo cables 
Connections between RC receiver and Ardupilot Mega v2 board
|
You May Also Like
SKYPE: +8615012643826 Email:yxy@xt-xinte.com
Copyright © 2006-2018 xt-xinte.com. All Rights Reserved.
  
|


No related record found